So I've covered walking but there need to be other ways the character interacts with the environment. The objects he is surrounded by are sometimes overwhelmingly larger than himself so in order for him to climb and walk around on these objects he needs to jump. This was a great opportunity for me to incorporate the technique of 'anticipation' into my animation. No one simply just stands on one spot then the next minute is metres into the air. There has to be some anticipation involved. So I animated the character stopping walking, turning to see the coffee cup, bending his legs and jumping to reach the top. See Below…
I was pretty happy with how this bit of animation turned out and I especially liked the idea of having the character swing his legs as a bit of secondary action when his arms grab hold of the top of the cup. Although, if I were to do this section of animation again I would have sped up the duration of how long the character is in the air before he reaches the top of the coffee cup. I feel it is too slow and too unnatural looking. Obviously i can break the laws of physics a bit as he does jump ridiculously high for a character of his size but I think it would be far more believable if the clip is sped up which can easily be done in post production.
Tuesday, 1 December 2015
The Void Animation Project: Animating my Character Exploring Scenery
So After my character learns to walk and gets a firm grasp on that he sets about exploring his surroundings, much to the dismay of Number 1. Obviously I was relatively new to animating with Maya so I knew that his movements might not be as fast paced as they appear in the animatic…


But luckily, from when we filmed our Live Action Reference Video, when Matt acted out the role of 54 we realised that his movements did not need to be quite so hectic and he still looked like he was young, full of energy and excited to investigate his new surroundings. So I could slow them down a bit…


When it came to animating the character exploring I felt that in this particular scene it was not necessary to stick entirely to the animatic because in the animatic we basically illustrate him flipping out. So this gave me the creative freedom to learn new movements such as having the character climb on the giant coffee cup…
Essentially I was basically making this up as I went along, I didn't plan him to climb the coffee cup, I just wanted to experiment with animating new movements like the character wants to experiment with new movements.
That being said, I still wanted to keep the physicality of the character relatively realistic so when animating some of his movements I kept in mind the physicality of a gymnast. This is because some of the stunts he attempts are like a gymnast. While looking at other references I needed to make sure I didn't lose the personality of the character. So the stunts could not be very elegant as he is still this pudgy being that doesn't really have a clue.
Sunday, 29 November 2015
The Void Animation: Animating my Character Falling from the Sky
Scenery complete, it was time to start animating my character. Matt and I had agreed to animate both our characters separately for as much of the animation as we can before they have to interact with each other. I feel this was a good decision as it meant we could manage our time effectively. Of course we go to university together and regularly see each other outside of university anyway but there is still a great deal of time we are not together and could be spent animating.
So with that in mind I begun animating my character. I was actually amazed at how quickly I was able to pick up the animation process. The great thing about Maya is all I have to do is drag my character into a certain pose, hit 'S' on every joint control and move all the joints to the next key frame pose, hit 'S' again and then Maya fills in the gaps creating smooth movement. I've really enjoyed this phase as it's allowed me to see my character coming to life. That being said, I have made a lot of mistakes with the process, most commonly, missing out joint controls I was supposed to press 'S' on and then the whole joint looking weird in the next pose.
The animation starts out with my character falling from the sky and literally springing into life. The idea is he has literally just come alive so in the first few seconds he can only shuffle around on the floor before standing up to take his first steps as an animated character which of course will be a bit shaky. It's a really nice irony because as my character is learning to walk, I'm learning how to animate him walking. All the movement he performs is movement he is learning at the same time as I am learning how to animate it. That is why as you watch the animation back his movements flow better and he looks generally smoother as the animation goes on because I am picking the animating skills.
The first scene involves the character falling from the sky and landing on the grid. It was essential that their is a slight bounce to when he hits the floor to give him that physicality of what I have often referred to the character as being 'like a bag of dough'. The challenge here and throughout the animating process was timing. Luckily I had learnt the skills of secondary motion in the first year of the animation course when we had to animate a rubber ball falling and hitting the floor and these were important skills I could apply to this process. Of course there are many differences to animating with traditional 2D animation to animating with 3D CGI animation. But I was amazed at just how many of the skills I could apply to animating with Maya that I had learnt just from animating with hand drawn 2D animation.
In the end the motion of the character falling and bouncing looked pretty smooth in my eyes. And I was able to render this whole first scene out on Maya to test and see how the animation was looking at this stage.
The Void Animation: Animating my Character Walking
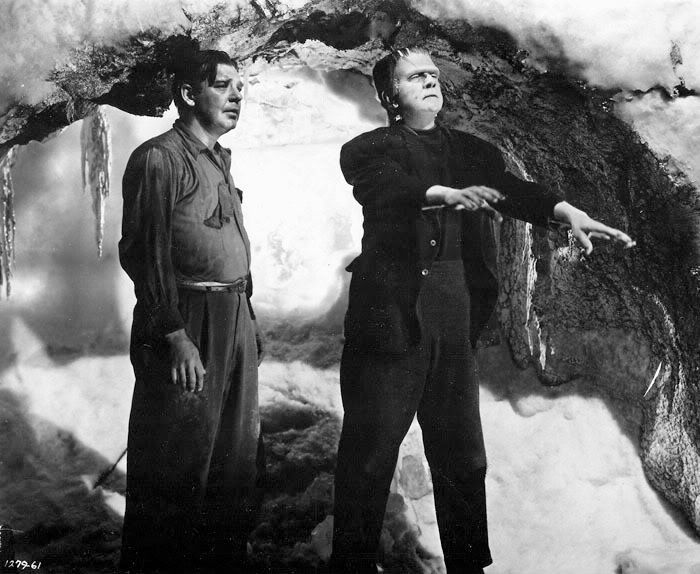
I think many people will agree that animating a character walking is pretty tricky but to me it's the cornerstone of animation. Our animation doesn't involve a lot of walking but it does involve some. Luckily as I have mentioned before, when my character first starts walking, it's him learning it for the first time which is the same with me animating the character walking for the first time so it's okay if he looks slightly wobbly, in fact I feel it adds to the charm. When it came to animating the character 54 walking for the first time inspiration came to me from how babies walk for the first time and how Frankenstein's monster walks. Upon playing back my footage I feel the character looks kind of cute but also kind of creepy at the same time, luckily I feel this adds to the animation and fits with the baby/Frankenstein theme.
Here are a few screen grabs of my character walking for the first time...


Here are a few screen grabs of my character walking for the first time...


It's a bit clunky, but luckily that is intended and if it needs to be sped up that can always be accomplished in post production.
Tuesday, 24 November 2015
Modelling Scenery
Now that both mine and Matt's models were complete we were ready to animate. But there was just one last thing... scenery. Of course we needed scenery but luckily for us, our set was going to be incredibly simple, as it is just the basic Maya template grid. But we did want to have a random assortment of objects darted about so they had to be modelled. Since time is of the essence we knew we could not spend to much time on anything that was not essential to the final animation, so we decided to only give ourselves a day to work on this.
We assigned each other a few objects to build and then set to work.
First I built a pencil...

The pencil was incredibly easy to model and I could apply the modelling skills I had learnt from modelling two characters so it was no problem at all. I used a photo of a real pencil as an image plane just to make it look as realistic as possible.

I also inserted a little Easter Egg in there for good measure. It might be slightly unnecessary but I feel it does show a certain attention to detail.

Then I modelled a Fire Exit sign which was even easier as it is literally just a UV mapped square. So I felt to challenge myself I would Photoshop some graffiti onto it. Again, not completely necessary but I like the idea that perhaps past characters that came before 54 were a bit reckless.

Lastly I modelled a coffee cup. Of course the Costya logo is not entirely necessary, but I felt it would be fun for viewers to spot a play on Costa Coffee.
Now the scenery is complete it is time to animate. No, I do mean it this time.
We assigned each other a few objects to build and then set to work.
First I built a pencil...
The pencil was incredibly easy to model and I could apply the modelling skills I had learnt from modelling two characters so it was no problem at all. I used a photo of a real pencil as an image plane just to make it look as realistic as possible.
I also inserted a little Easter Egg in there for good measure. It might be slightly unnecessary but I feel it does show a certain attention to detail.
Then I modelled a Fire Exit sign which was even easier as it is literally just a UV mapped square. So I felt to challenge myself I would Photoshop some graffiti onto it. Again, not completely necessary but I like the idea that perhaps past characters that came before 54 were a bit reckless.
Lastly I modelled a coffee cup. Of course the Costya logo is not entirely necessary, but I felt it would be fun for viewers to spot a play on Costa Coffee.
Now the scenery is complete it is time to animate. No, I do mean it this time.
Personal Maya Model Complete!
It's finished. I'd ran into so many hurdles but I've finally finished modelling the character '54' for mine and Matt's animation The Void. Painting the weights was the last major hurdle for me. It appeared so simple at first but it would happen multiple times that I'd paint a few limbs then try to move them, and it would just not look right at all. In particular I had major trouble with the right leg. I had painted the left leg previously and that looked fine in motion but then for whatever reason the right leg didn't work the same, I had painted it exactly the same but it still didn't work correctly. But eventually with much re-painting, it worked. So now I have a finished model! It's ready to be animated and now I'm just excited to finally get some footage together.
Sunday, 22 November 2015
Creating a Live Action Video for Refference
One thing I noticed in many of the talks I went to at the Manchester Animation Festival is that a common trend the animators would show us would be Live Action Videos for reference. For example, when someone came out to talk about the making of The Shaun the Sheep Movie, they would show us footage of animators acting out certain scenes to help them with understanding the emotions, facial expressions and physicality of the characters.
This process seems incredibly important to the process and incredibly important to make the best animation possible and I got the feeling from the talks that animators use it for literally every shot depicting a character, even shots that last no longer than a second. So the idea of Matt and I creating a LAV for our own animation seemed like a great idea.
Of course Matt and I have weaknesses when it comes to working in a pair, but we also have similar strengths that are only better enhanced through being in a team. One of these strengths is acting. We rarely admit it but I think we both love acting and whenever there is the chance to perform we go for it, whatever it is.
With this animation I felt like it was very important to act it out because it is incredible character based so I thought if we captured the emotions we want to give each character ourselves then when it came to animating, our jobs are far easier because we simply have to look at the reference footage.
Although some of the footage might look like we're being silly and just having fun, we did take it very seriously as we felt the better we could act out the emotions and physicality of our characters the better we could animate them. Here is what inspired me when it came to performing these characters...


Okay, I'm not exactly Jack Nicholson in terms of acting ability but you get the idea...

Painting the Influence Weights of my Personal Maya Model
Ah, this was tricky. Usually when I would get a bit stuck throughout this process Matt's tutorials would help me out a great deal., But as I have mentioned before, his model and my model look very different so of course painting the influence weights is going to be very different. Painting the weights is basically the process of making sure that if I move an arm joint for example, it only moves the arm, not part of the head as well which it did before I had painting the weights.
Luckily my partner Matt had just finished this process so his model, with a similar physicality to my own proved to be a very good guideline to how I should paint each of my joints.

Throughout this step I tried to keep in mind that my character didn't need to move perfectly. He's not quite a teddy bear, more a bag of cookie dough. With this in mind I new that his body shape didn't have to remain completely consistent with every move.


As you can see, it isn't perfect, he's slightly limited in how he moves. But luckily this doesn't matter too much as the point of the character is that he is slightly faulty. The main thing is, his mouth moves, so he can talk, his eyebrows move, so he can express emotion, his legs move and bend so he can walk and his arms move.
Overall I am happy with how my personal Maya model is turning out and there's just a few final tweaks and tidying up to do before I am ready to animate.
Luckily my partner Matt had just finished this process so his model, with a similar physicality to my own proved to be a very good guideline to how I should paint each of my joints.

Throughout this step I tried to keep in mind that my character didn't need to move perfectly. He's not quite a teddy bear, more a bag of cookie dough. With this in mind I new that his body shape didn't have to remain completely consistent with every move.


Overall I am happy with how my personal Maya model is turning out and there's just a few final tweaks and tidying up to do before I am ready to animate.
Binding the Mesh of my Personal Maya Model (Of which point mistakes were made)
Right, this was the point where all my work so far on creating my personal Maya model would be put to the test because if my model didn't fully work at this stage I could not progress and I would have to go back and fix my mistakes... which is exactly what happened.
I think I probably ended up binding the mesh to the joints of my Maya model about five times before everything worked. One problem that kept occurring was that I kept finding joints that were not correctly oriented, if oriented at all (as I mentioned in the previous post). This meant I kept on having to go back and re-orient these controls. Personally I do not have the best memory and I will often have forgotten would I had just done five minutes ago so of course having to backtrack would confuse me to the extent I would get myself tangled in a Maya-like web.
The stages of binding the mesh of my model and attempting painting the influence weights of my Maya model took me around nine hours. Of course it shouldn't take that amount of time. I had just made to many mistakes that all needed fixing, all these mistakes seemed minor at the time and the errors were simply down to me, aware that I was behind on work trying to rush Maya. And another point I have learnt with working with Maya is that you simply cannot rush it. Maya is a complicated software but it does become pretty straight forward to understand when you take a breath and go through each step slowly, paying close attention to detail.
Because I had rushed, I was now paying for it.
Another point I have learnt from working with Maya is that you cannot do it tired. I'm one of those people that when I have had an extreme deficiency of sleep I tend to forget things, kind of like Edward Norton's character from Fight Club. And forgetfulness is not a good thing for working with Maya. When I'm tired and aware that I'm making mistakes it is simply a waiting game of when to give up completely.
After this session where mistakes kept on being made, I came back to it after a few days after having returned from Manchester Animation Festival. I was amazed at the difference. I was able to fix the problem I was struggling with in under forty five minutes and everything just became so much clearer to me.
Orienting the Controls of my Personal Maya Model
Before I carry on I need to insert a footnote, basically for my own benefit.
When it comes to orienting controls, even though it might seem kind of boring, just check all the controls work before proceeding any further because you will run into problems and the effort of having to go back and correct these problems has proven to me to be far more time consuming then if I just double check immediately after.
Anyway, connecting the controls to each joint was pretty simple, the most important thing with this step was just to keep organised with everything I was doing. Meaning that some of my actions might not be immediately visible. For example one mistake I kept making was backtracking.
Throughout this entire process the 'edit-undo' button has pretty much been my best friend. I accepted very early on that it's completely okay to make mistakes and even if I have to go back far it's all about learning curves. Having said that sometimes it is literally too easy to undo my actions. Because all I have to press is 'Z' sometimes I can be a bit reckless with my button tapping and when I was doing the controls I found that I would make a mistake with orienting one joint then undo it but accidentally go back too far, for example, if I only wanted to undo orienting the left wrist joint I would also accidentally undo the elbow and shoulder joints. These errors I wouldn't pick up on until later in the process so it would go unseen until it trips me up.
Anyway after a few hiccups, the orienting of the controls is complete and now it is finally time to bind the joints to the mesh to create a fully physical model!


Adding Controls to my Personal Maya Model
Okay, the skeleton is complete, now it's time to add controls!
The process of building up a Maya model reminds me of what it might be like to build an actual human being. First you mould him, then add a skeleton, then add muscles. And that is basically what I'm doing now.
As with the skeleton, this process was relatively straight forward but also allowed me the freedom to add my own creativity as I knew mine and tutor Matt's controls would not look too similar as they have to fit each character.
One creative decision I made was to not give my character eye controls. I felt if I could avoid it I wouldn't waste time on anything unnecessary and since my characters eyes are just black balls I felt giving them the ability to look around would just be kind of pointless.
Now the controls are complete the next process will be orienting the controls with the skeleton and then I will be close to giving my character physicality.

Adding a Skeleton to my Personal Maya Character
It should be noted that adding a skeleton to any Maya character is far easier than anything of what's come before in the creating a character process or what is to come. I had virtually no problems with this stage which I am glad to report. Of course I looked to my Maya model that we had modelled after tutor Matt's to get an idea of how to insert a skeleton into our own models. But, I was aware that the physicality of both of these models are not entirely identical...
My Maya Model...

Tutor Matt's Maya Model...

So, I knew I wasn't going to be able t replicate this process exactly as I had done before which you know what, is no problem. I might complain about struggling with Maya a lot but looking back I have learnt a great deal. But the most important thing I feel I have learnt is yes I can follow the tutorials but a great deal of working with Maya is simply about applying common sense. If I look at something and feel it doesn't look right, it's up to me if I want to change it. Because of how complicated the software is to me I often forget that in fact there are no 'right answers' when it comes to using Maya, and the same is applied to adding a skeleton.
This is the stage where I could totally use my common sense to create something imagining what it is going to look like performing physical actions.

So, it doesn't exactly look like the average human's skeleton but luckily it doesn't matter, all that matters now is ensuring that all the joints are going to work together.
My Maya Model...
Tutor Matt's Maya Model...
So, I knew I wasn't going to be able t replicate this process exactly as I had done before which you know what, is no problem. I might complain about struggling with Maya a lot but looking back I have learnt a great deal. But the most important thing I feel I have learnt is yes I can follow the tutorials but a great deal of working with Maya is simply about applying common sense. If I look at something and feel it doesn't look right, it's up to me if I want to change it. Because of how complicated the software is to me I often forget that in fact there are no 'right answers' when it comes to using Maya, and the same is applied to adding a skeleton.
This is the stage where I could totally use my common sense to create something imagining what it is going to look like performing physical actions.

So, it doesn't exactly look like the average human's skeleton but luckily it doesn't matter, all that matters now is ensuring that all the joints are going to work together.
Monday, 16 November 2015
Modelling My Personal Maya Character
When working in a collaboration I think distributing the workload can be a bit of an issue. When it comes to Matt and I working together we kind of just want to do everything together, the storyboarding, the script etc. But I do feel like even though that's often a better technique than giving each other work and then leaving the other to do it independently, sometimes it does slow the work down, particularly because Matt and I are easily distracted people anyway, working together all the time we are likely to distract each other more.
So we decided that since we are working with two characters for our animation, that one would focus their time on one character and the other would focus their time on the other.
We are currently I'm the process of modelling our characters so we decided that Matt would model the character '1'since he designed that character and I would model '54' since I designed that character.
Here is my modelled character...
I managed to model the character in a day which to me was incredible considering when I first used Maya it took me three hours to model a simple truck (it should take around ten minutes) and very recently it's taken me weeks to mould a character in Maya. That was admittedly my first real experience with the software so I was learning if as I was going along but still I had no idea how quickly I was picking it up.
Is the final model entirely accurate against tutor Matt's model? Well no. But luckily I feel any perfections the character has gives it more character.
So we decided that since we are working with two characters for our animation, that one would focus their time on one character and the other would focus their time on the other.
We are currently I'm the process of modelling our characters so we decided that Matt would model the character '1'since he designed that character and I would model '54' since I designed that character.
Here is my modelled character...

I managed to model the character in a day which to me was incredible considering when I first used Maya it took me three hours to model a simple truck (it should take around ten minutes) and very recently it's taken me weeks to mould a character in Maya. That was admittedly my first real experience with the software so I was learning if as I was going along but still I had no idea how quickly I was picking it up.
Is the final model entirely accurate against tutor Matt's model? Well no. But luckily I feel any perfections the character has gives it more character.
Wednesday, 4 November 2015
Character Modelling: Rigging and Creating the Controls
So, I feel like I am picking up and learning Maya relatively quickly. In comparison to a month ago where I literally knew nothing there has been a massive change. Where I am at right now is currently in the middle of the long process of rigging my character, as in Matt's model. It is going well considering how much I have struggled with certain aspects of character modelling in the past. I have built a skeleton for the character and now I am connecting the joints to the body almost like to me if you imagine a skeleton being given it's muscles. And as I am picking up the process of rigging I am starting to enjoy Maya more and more as it's looking more and more like a real character so I can see how much work has already been done.

Don't get me wrong, it's still a very slow process but even the slow parts, I am enjoying. The idea of grouping and naming everything I create E.G. 'left arm' sounds like it could be tedious but I am even enjoying that because I know it's all about keeping organised so there is less threat of becoming entirely lost later on.

Don't get me wrong, it's still a very slow process but even the slow parts, I am enjoying. The idea of grouping and naming everything I create E.G. 'left arm' sounds like it could be tedious but I am even enjoying that because I know it's all about keeping organised so there is less threat of becoming entirely lost later on.
Friday, 30 October 2015
Responsive Studio Brief 1: Individual Practice
We have just started our new module Responsive. In the first actual lesson for this subject our class was split in half and we were put in a room with some illustrators. The Responsive module is basically about how we as individuals dissect briefs and go about tackling them. Now at the start this sounded pretty simple to me. But after this lesson I realised that when I personally am set a brief I usually just skim over it and go right into it without fully understanding what it is exactly the brief wants from me. We were given two examples of briefs we as animators or illustrators could be set...


Then we were asked to work in a group and figure out the following...

As you can see my sheet is rather lacking. I feel his is partially down to the briefs themselves. They were not good, in particular, the BBC brief. The brief set by the WPP seemed very ethical as it was with the purpose of trying to get 33 million girls into school whereas the BBC seemed to be setting us a brief that was just about promoting themselves to young people aged 15 to 24. Either way they both were not briefs I would pick myself but still I felt the session was very informative because these two briefs took a lot of reading and re-reading to actually discover what it was they were asking of us and showed me that the briefs we are set by the uni have actually been far simplified down compared to other briefs you might get in the business.
Saturday, 24 October 2015
The Potential and Limitations of 3D Modelling and Animation Technologies and Techniques: Part 4
Okay I've talked about Pixar before and where they went wrong in the past, now I want to talk about their future. Pixar as an animation studio have done an incredible job at combining realism with fiction. For example the textures and landscapes have only become more evolved over the years becoming more and more visually stunning and realistic. Whereas the characters have remained at a visually unrealistic level. Now my fear about upcoming Pixar films is that as the technology evolves and the worlds these characters live in look more an more realistic, the characters themselves could end up sticking out like a sore thumb. At the moment with their last film Inside Out I feel we are at a really nice level...
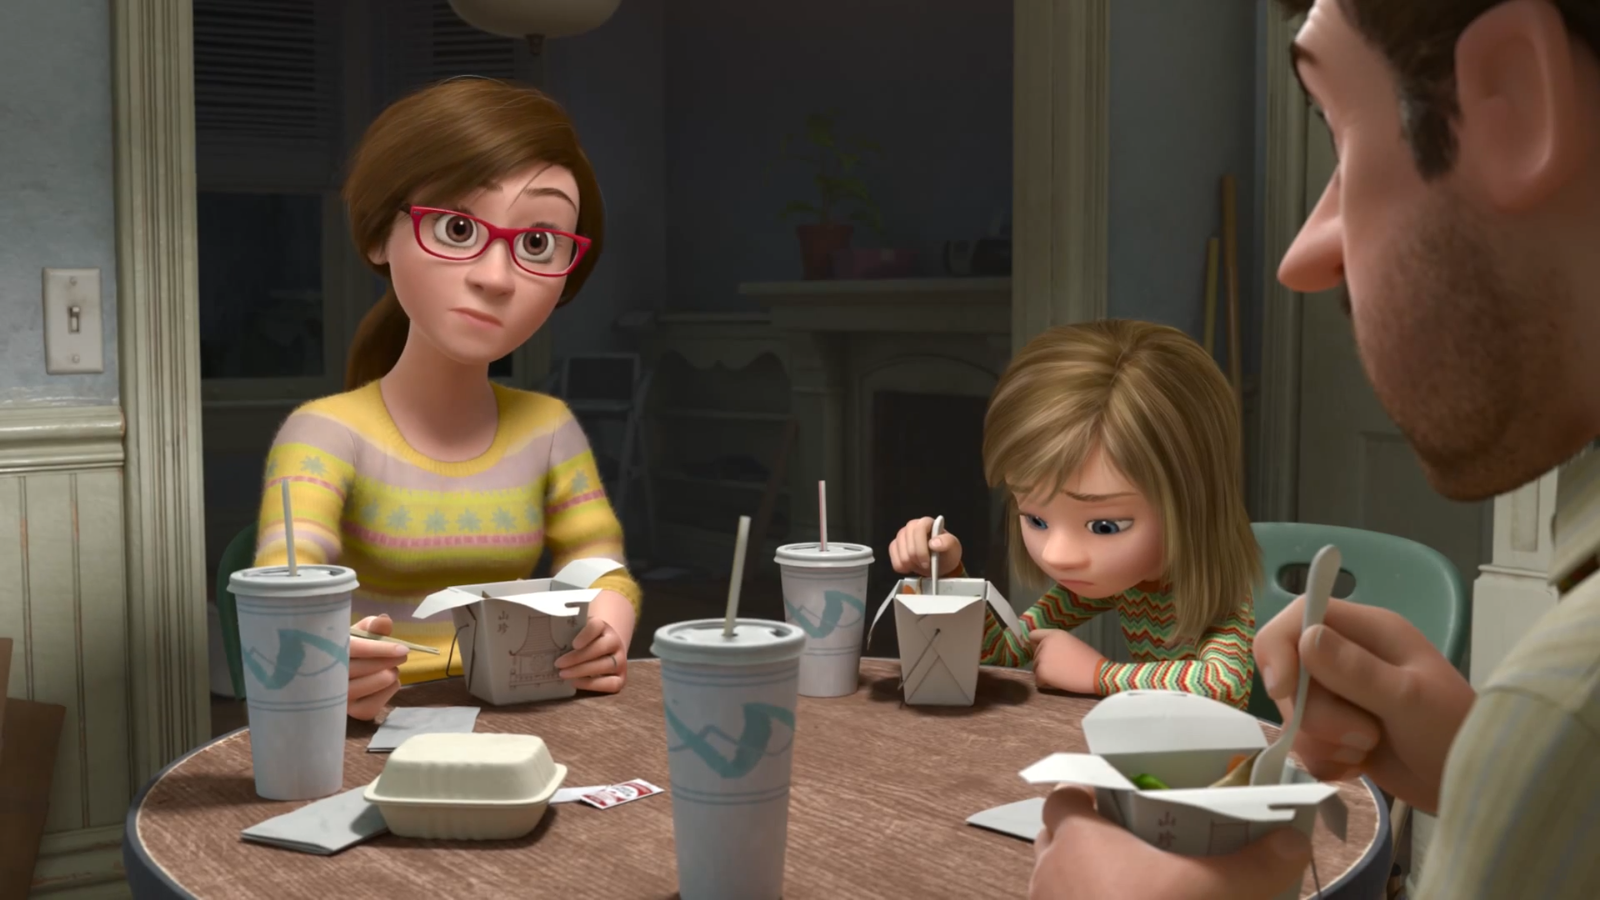
So the textures of the clothes the characters wear looks incredibly realistic as does their hair and surroundings yet their physicality is unrealistic...

Riley's head is hugely out of proportion as are her eyes for example. But that's fine because that disconnect between reality and fiction is an essential part of ever Pixar film's appeal.
But I did recently see the trailer for their upcoming film The Good Dinosaur...


Now the visual style did slightly worry me. For me I felt that although the landscapes in the trailer looked visually stunning, the characters didn't quite seem to fit in with the world their living in quite as easily as in past Pixar films. The dinosaur and the boy look almost too cartoony to fit in with the world, but that's where we reach a major conundrum. If the characters looked more realistic, e.g. more features and smaller eyes they might lose a bit of that connection with the audiences. From watching the trailer it was clear who we as the audience are going to root for due to the nice simple character design but then to me there's also a bit of a problem with them standing out too much.
I only watched a two minute trailer, it could be, and I truly hope that when it comes to watching the actual film I'll have forgotten about this within the first five minutes of the film and will have been completely emerged but right no this issue, that could just be my opinion alone in thinking it, does worry me.
So the textures of the clothes the characters wear looks incredibly realistic as does their hair and surroundings yet their physicality is unrealistic...
Riley's head is hugely out of proportion as are her eyes for example. But that's fine because that disconnect between reality and fiction is an essential part of ever Pixar film's appeal.
But I did recently see the trailer for their upcoming film The Good Dinosaur...
Now the visual style did slightly worry me. For me I felt that although the landscapes in the trailer looked visually stunning, the characters didn't quite seem to fit in with the world their living in quite as easily as in past Pixar films. The dinosaur and the boy look almost too cartoony to fit in with the world, but that's where we reach a major conundrum. If the characters looked more realistic, e.g. more features and smaller eyes they might lose a bit of that connection with the audiences. From watching the trailer it was clear who we as the audience are going to root for due to the nice simple character design but then to me there's also a bit of a problem with them standing out too much.
I only watched a two minute trailer, it could be, and I truly hope that when it comes to watching the actual film I'll have forgotten about this within the first five minutes of the film and will have been completely emerged but right no this issue, that could just be my opinion alone in thinking it, does worry me.
The Potential and Limitations of 3D Modelling and Animation Technologies and Techniques: Part 3
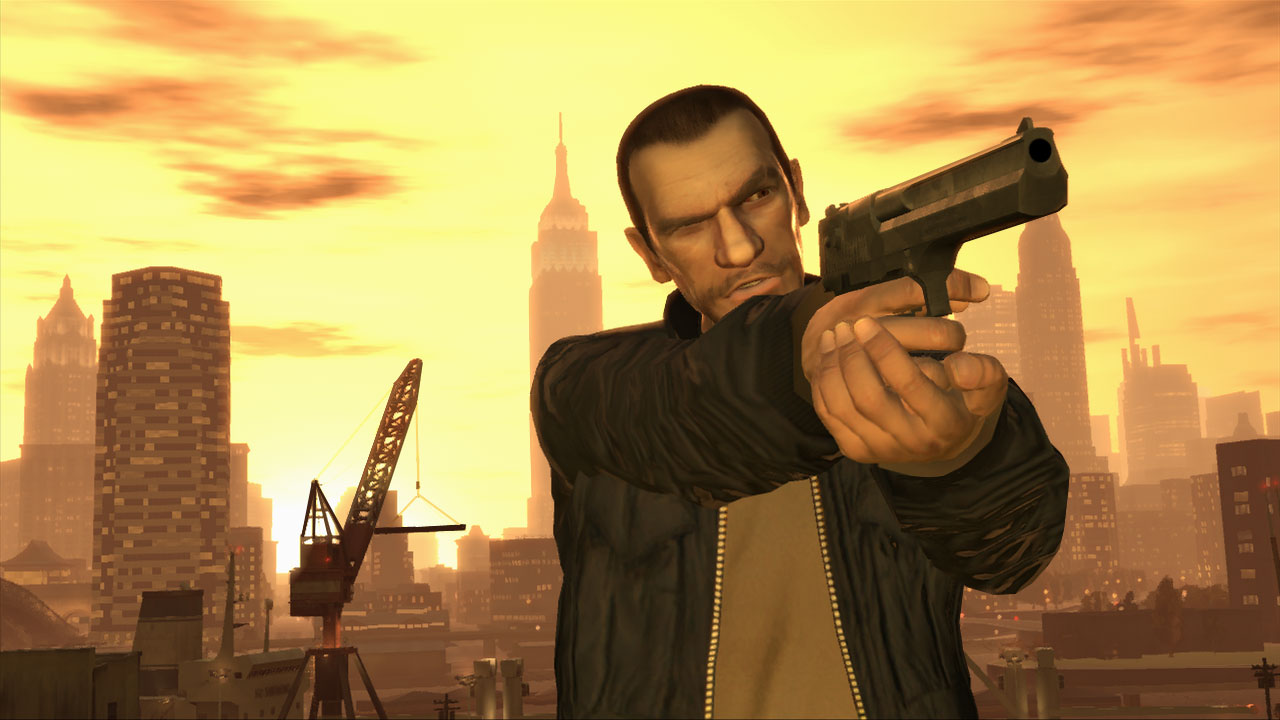
Okay so in the previous blog posts about the limitations and possibilities a common thought of mine is that using motion capture to create humans hasn't been as successful as when its been used to create creatures. Although, that being said when motion capture has been used to create humans often it has made these characters more emotionally relatable than if they had just been animated without it. A key example for me is the Grand Theft Auto video game series.

So when I played Grand Theft Auto Four, the main protagonist had been created without motion capture and although I really liked playing as the character there was an emotional disconnect of which I had fully realised until playing the fifth in the series.

And then the fifth game in the series came along that had been created with using motion capture and I completely noticed the difference. There is now so much more emotion in the characters and they feel so much more life like and personally I found I could connect with them far easier.
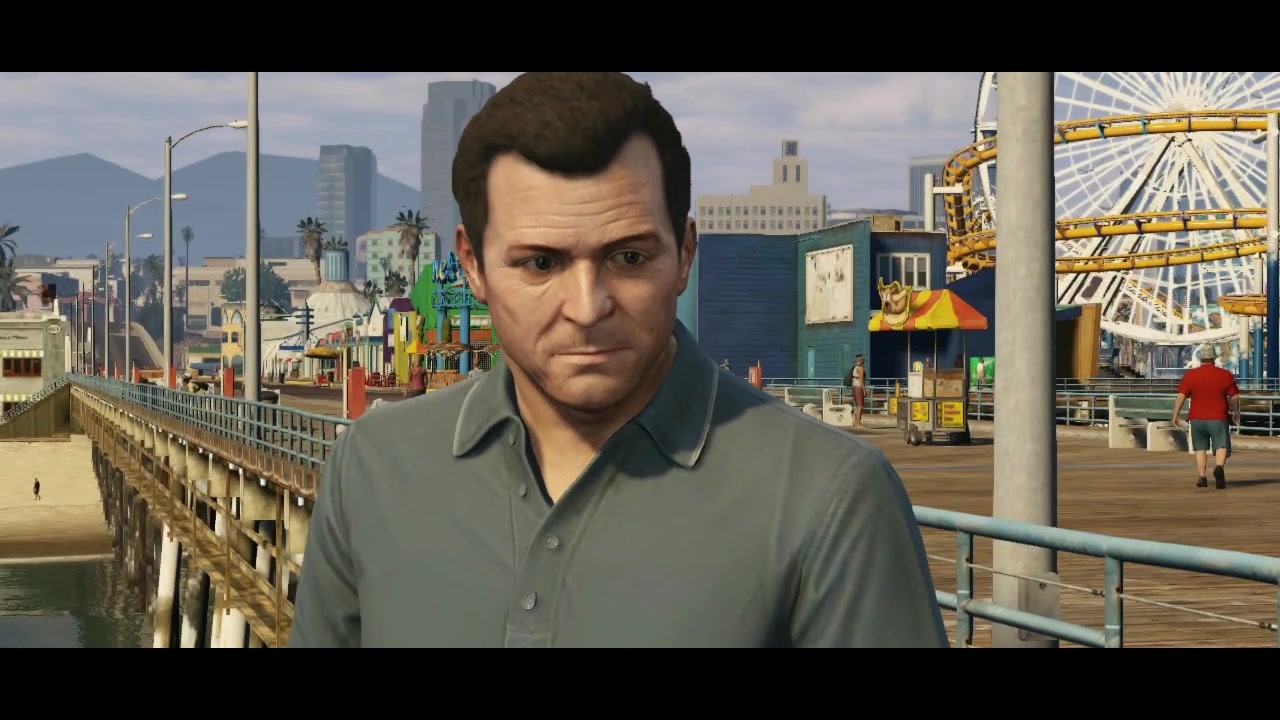


(Above: The real life actors who portray the three GTA5 protagonists Trevor, Franklin and Michael)
Now these characters because of the motion capture technology are easier to relate to and we as the player feel we can relate to them easier. That being said, playing the game I still find there is a disconnect to reality which in the case of playing a Grand Theft Auto game I feel is great and one of the games strong points. The reason for this is that for one some of what these characters do in the game is pretty appalling, their are many causalities and a lot of destruction is caused, destruction we the player are responsible for. But it doesn't matter because we know what we're playing isn't real, it's a fiction, they look realistic but we know their not real which is very important. I personally feel if the characters did just look like real human beings the player would not be comfortable carrying out any of the actions that take place in the game. Now whether this is a limitation or a potential to me is slightly unclear, I feel it's neither. I feel the Grand Theft Auto franchise has met a nice point to stay at regarding it's animation in Grand Theft Auto Five.

So when I played Grand Theft Auto Four, the main protagonist had been created without motion capture and although I really liked playing as the character there was an emotional disconnect of which I had fully realised until playing the fifth in the series.
And then the fifth game in the series came along that had been created with using motion capture and I completely noticed the difference. There is now so much more emotion in the characters and they feel so much more life like and personally I found I could connect with them far easier.
(Above: The real life actors who portray the three GTA5 protagonists Trevor, Franklin and Michael)
Now these characters because of the motion capture technology are easier to relate to and we as the player feel we can relate to them easier. That being said, playing the game I still find there is a disconnect to reality which in the case of playing a Grand Theft Auto game I feel is great and one of the games strong points. The reason for this is that for one some of what these characters do in the game is pretty appalling, their are many causalities and a lot of destruction is caused, destruction we the player are responsible for. But it doesn't matter because we know what we're playing isn't real, it's a fiction, they look realistic but we know their not real which is very important. I personally feel if the characters did just look like real human beings the player would not be comfortable carrying out any of the actions that take place in the game. Now whether this is a limitation or a potential to me is slightly unclear, I feel it's neither. I feel the Grand Theft Auto franchise has met a nice point to stay at regarding it's animation in Grand Theft Auto Five.
Subscribe to:
Comments (Atom)